

Nano Banana User Guide: From Your First Prompt to a Reviewed Image
A practical Nano Banana User Guide to writing clear prompts, working with references and refining images, with historical screenshots and current-workflow cautions.
About this walkthrough: The screenshots show the September 2025 interface. For today’s controls, open the image generator, check current pricing and review your balance before submitting. Model options and credit rules can change; registration gifts depend on eligibility, and failed tasks may need reconciliation before credits are restored.
The archived Nanobanana.co homepage puts the central idea front and center: bring a photo, describe an edit and see a new version. Its Try Now / Launch AI Image Editor button provides the starting point for the historical walkthrough below.
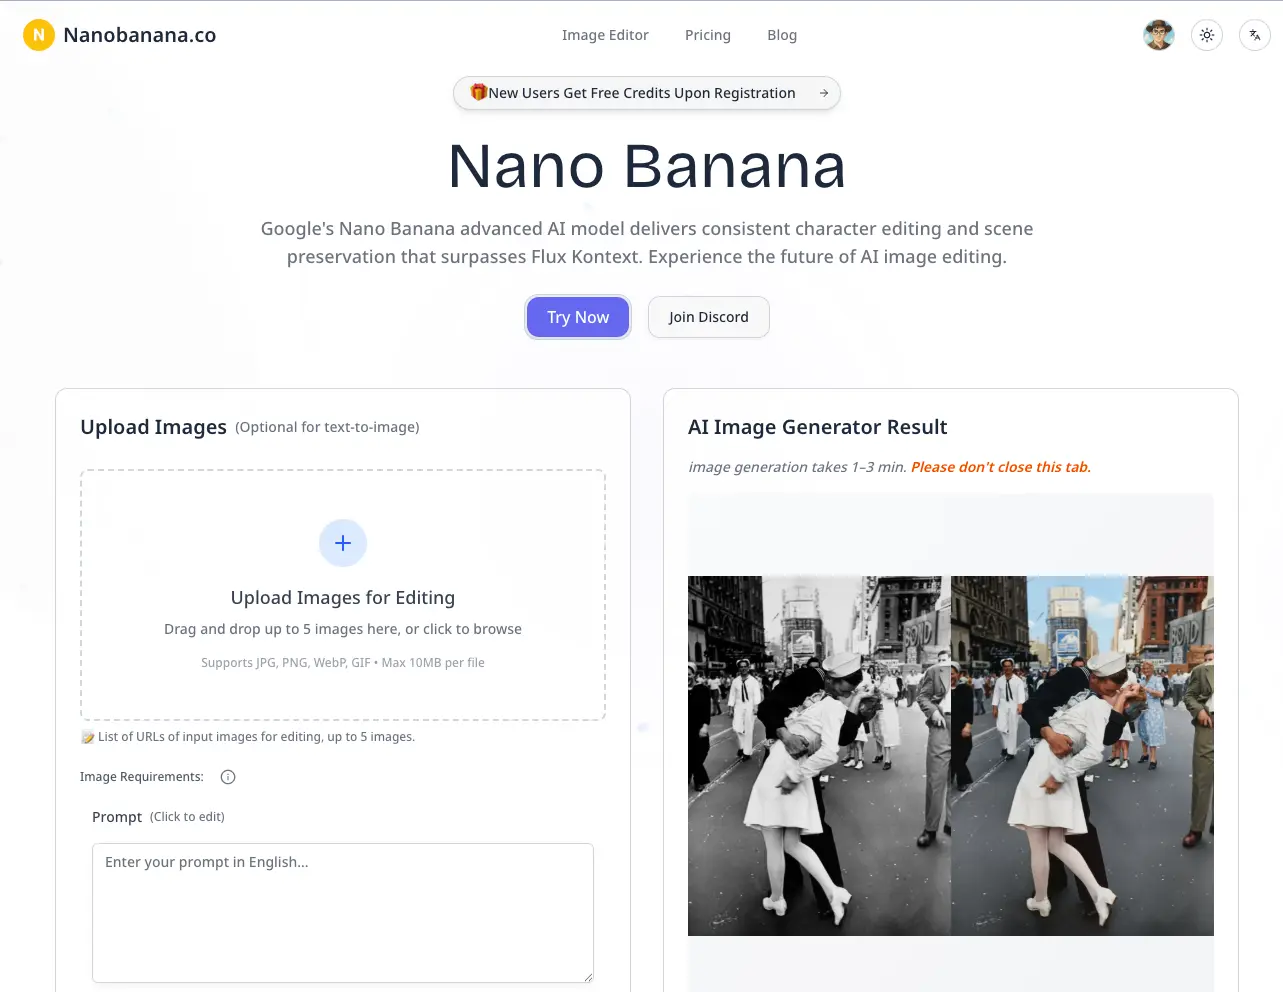
Nano Banana offers a way to explore edits through ordinary language. Instead of beginning with selection tools and layers, you explain what should change and what should remain recognizable. The important next step is reviewing whether the output actually respects those instructions.
This guide follows the journey from a first brief to a reviewed image. The 5W1H framework helps you choose a useful task, while SMART goal setting turns open-ended experimentation into a project with a clear finish line.
Plan Your First Edit with the 5W1H Framework
Who Should Use Nano Banana?
Nano Banana can be useful to creators with a specific visual task:
- Photographers: Explore retouching ideas before a finishing pass
- Designers: Compare backgrounds and early visual directions
- E-commerce teams: Try product settings and campaign concepts
- Marketers: Develop images around a message or offer
- Content creators: Sketch thumbnail ideas and recurring visual themes
What Is Nano Banana?
Nano Banana is the nickname for Google’s Gemini 2.5 Flash Image model. On an image-editing page, the essential interaction is a reference image paired with a written instruction.
Tasks to explore:
- Describe an adjustment in everyday language
- Change a scene while checking the subject’s appearance
- Try a different background or environment
- Combine ideas from several reference images
- Explore restoration or style treatments and review the details
Model and service considerations:
- Gemini 2.5 Flash Image is the underlying model family discussed here
- SynthID is Google’s technology for identifying AI-generated content, not proof that an image is factually true
- Content policies and available controls depend on the service you use
When to Use Nano Banana
Start with a task where a visual draft will help you decide what to do next:
- Explore a thumbnail concept for a campaign
- Place a product in a proposed lifestyle setting
- Try a restoration treatment on a copy of an old photo
- Visualize a room or scene before further design work
- Develop related images for a content series
Where to Access
Open the browser-based image workspace: SotaVideoAI
- Work in the browser without installing a desktop editor
- Check the uploader for supported formats and file-size limits
- Keep local copies of references and any results you want to retain
Why Choose Nano Banana?
Reasons to try this approach:
- Reference-led editing: Use a source image to communicate the subject
- Focused revisions: Explore a change without rebuilding the whole brief
- Plain-language control: Describe the result you want in your own words
- Reviewable output: Compare each generation with the original before moving on
How It Works
A practical editing sequence:
1. Account → Sign in and check your available credits
2. Reference → Upload an image that clearly shows the subject
3. Prompt → State the change and the details to preserve
4. Generation → Submit and follow the task status
5. Review → Inspect the result and plan any revision
6. Download → Save the chosen image and its prompt
Your First Image, Step by Step
Step 1: Open the Workspace and Check Your Account
Reading the archived homepage: The screenshot introduces background changes, subject preservation and image combination. Treat these as editing goals to test with your own reference, rather than promises that every attempt will produce a finished image.
The registration screen:
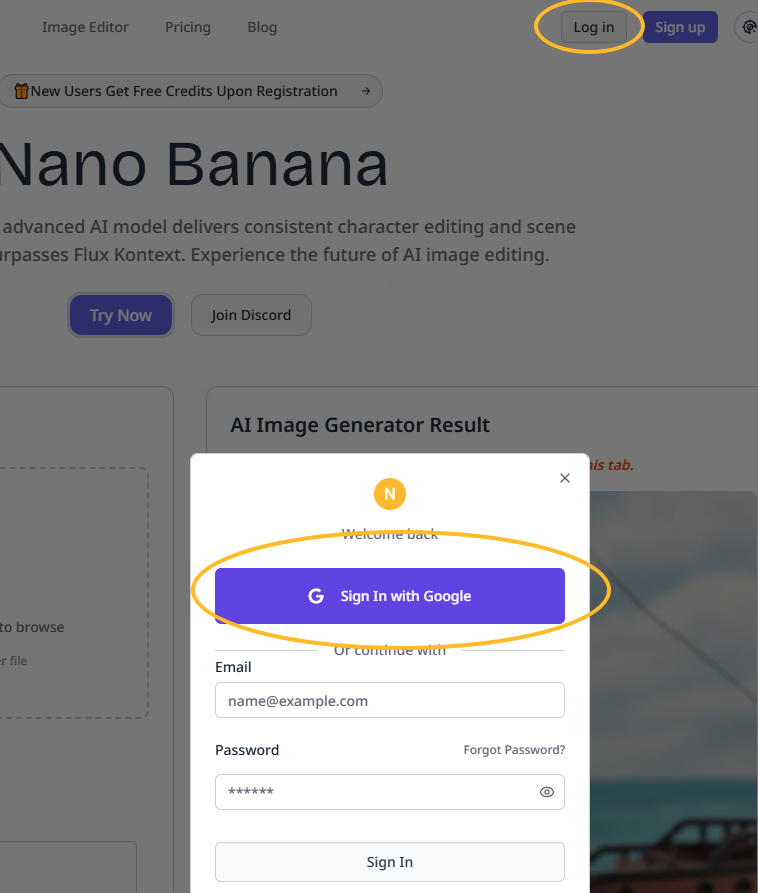
Archived account-creation screen from the original walkthrough
- Follow the sign-in or registration options shown in the current interface
- Check whether your account has any eligible starter credits
- Review your balance before making a generation request
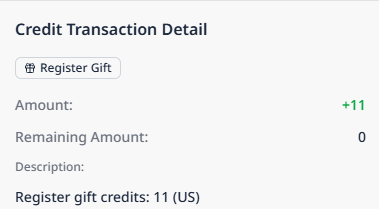
Step 2: Understand the Cost Before You Generate
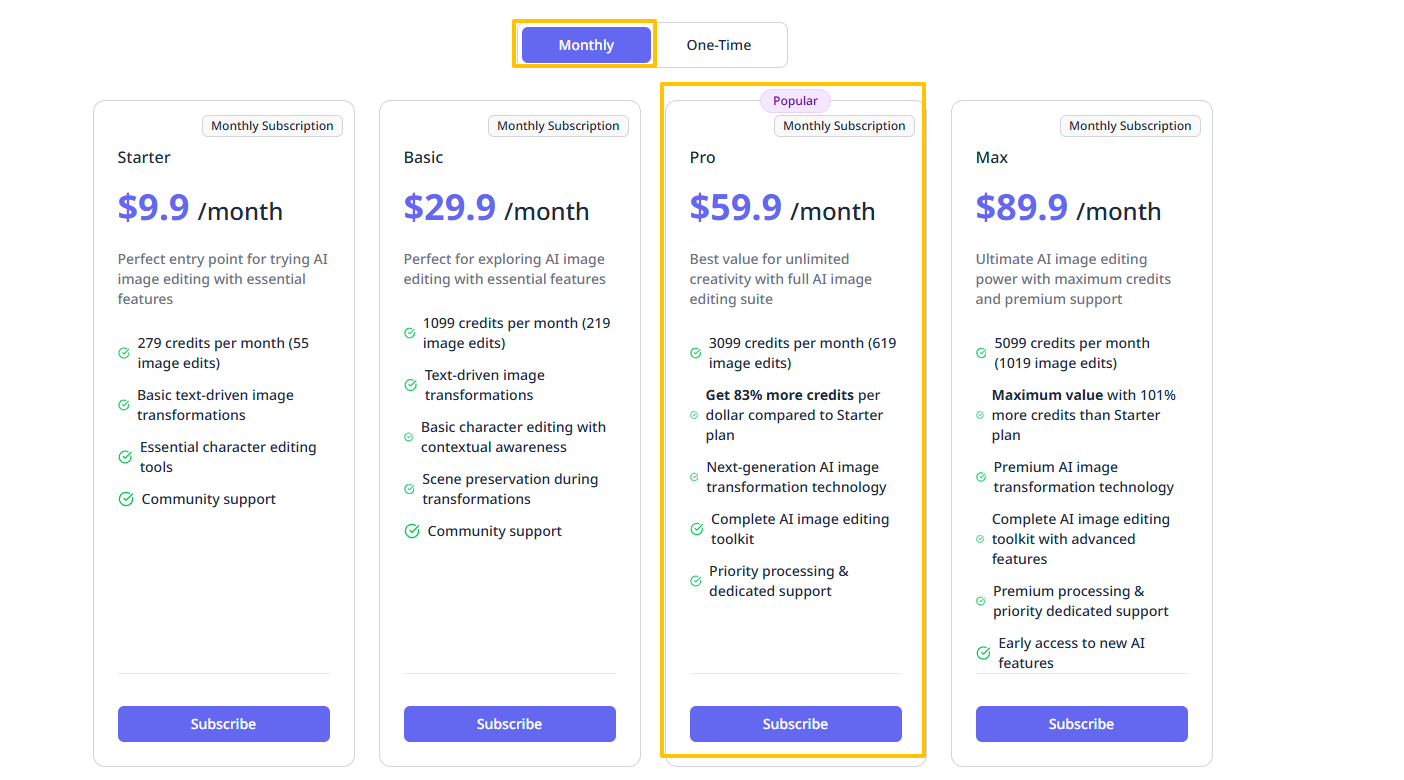
Reading the historical plan names:
- Starter: Check the current allowance before planning a small project
- Basic: Compare the available credits with your expected usage
- Pro: Allow for revisions as well as first attempts
- Max: Choose only after estimating the volume you actually need
Keep your first test small
Try one focused brief and inspect the result before planning a larger set. Review the displayed quote for each request; do not assume a trial is available or that failed-task credits are restored immediately.
Step 3: Get Familiar with the Editor
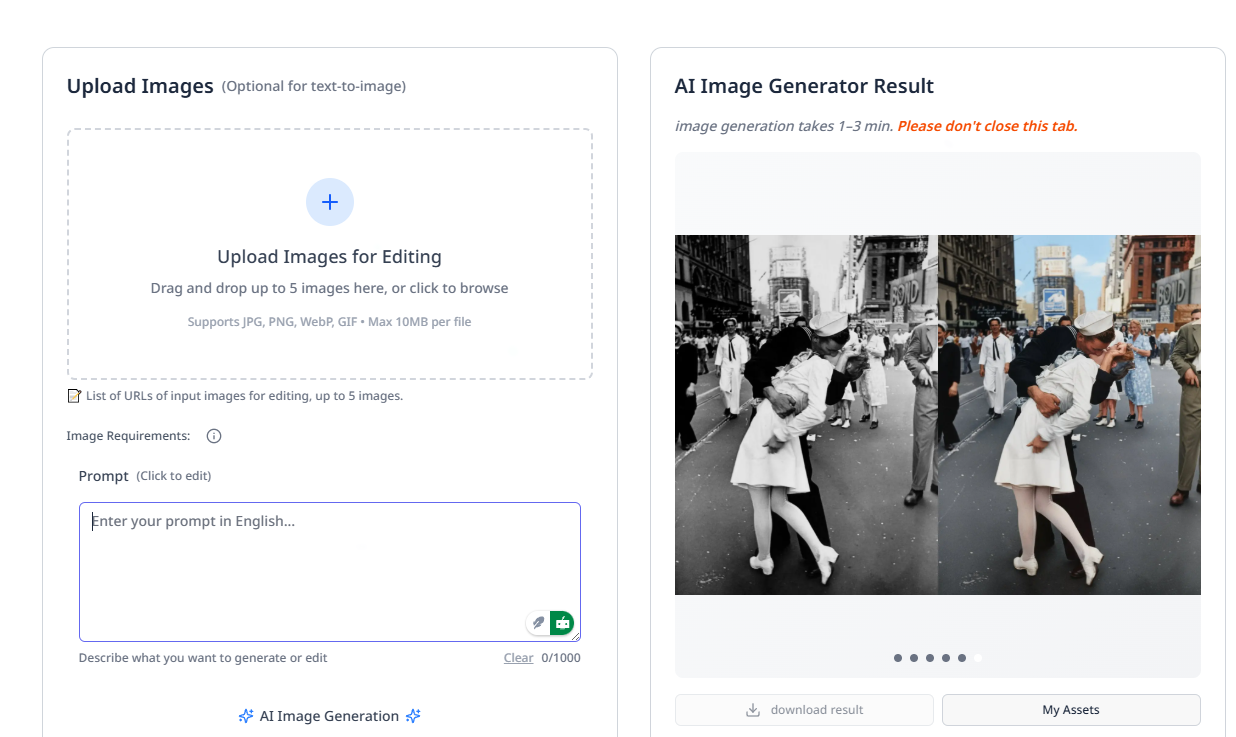
What to locate before starting:
- The area for adding reference images
- The field for your written instructions
- The generation button and its credit quote
- Your available balance and task status
Step 4: Write a Prompt You Can Evaluate
An example with a clear subject and change:
Give the street a warm sunset sky.
Place a small neon sign reading "OPEN" in the shop window.
Gently brighten the person’s face,
keeping their facial features and expression unchanged.
Make the instruction easier to follow:
- Name the object or area you want to change
- State which features should stay as they are
- Describe the direction and mood of the light
- Separate several changes into clear instructions
Step 5: Inspect the Generated Image

Reviewing the result:
- Let the task finish; completion time can vary
- Follow the status shown by the interface
- Compare each returned image with the brief
- Check the preview before choosing what to download
Step 6: Refine One Detail at a Time
A focused follow-up instruction:
Make the neon sign slightly dimmer.
Keep the person’s skin tone and expression unchanged.
A useful revision pattern:
- Preserve the parts that already work
- Pick one visible problem for the next request
- Describe the change in relation to the current image
- Supply the intended result as a reference when the workflow requires it
Step 7: Save the Result and the Working Context
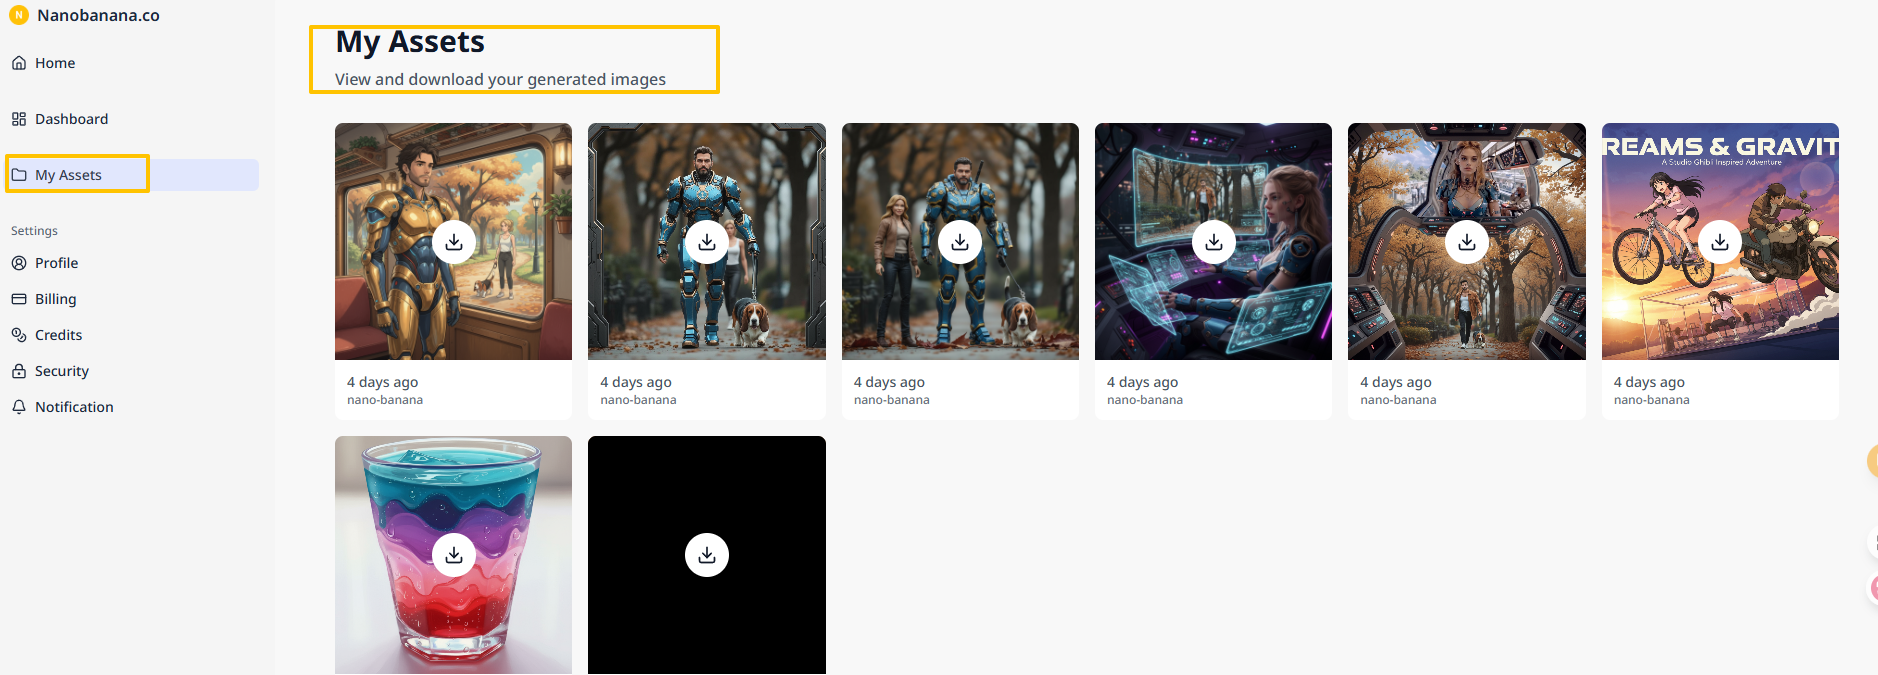
A simple saving routine:
- Download the available output format
- Keep the selected result with its source images
- Save prompts alongside the versions they produced
- Give files clear names so you can find the right revision
Use SMART Goals to Keep the Project Focused
Image generation is easy to explore and easy to overextend. A clear project plan helps you decide when an output is good enough, how much revision is reasonable and when to stop. Use SMART goals as a planning tool, not a promise of business results.
Turn the Brief into a Measurable Task
Specific: Define the images and the purpose they serve
- “Prepare 20 thumbnail concepts for a campaign review”
- “Create 15 product-scene drafts for a seasonal launch”
Measurable: Track what you used and what you accepted
- Record total credits alongside usable images
- Note how many revisions each selected image needed
Achievable: Match the scope to your available time and balance
- Run a small sample before budgeting a full set
- Leave room for rejected results and additional edits
Relevant: Connect the work to a real publishing need
- Prioritize assets for a defined campaign or client deliverable
- Separate production requests from open-ended experiments
Time-bound: Decide when review and delivery will happen
- Set a review date for the campaign concepts
- Schedule a final check before catalog publication
A Sample SMART Brief
Objective: Refresh a set of product images
Specific: Prepare 15 lifestyle concepts with seasonal settings
Measurable: Review each against an agreed product-detail checklist
Achievable: Estimate the credit budget after a small sample run
Relevant: Supply candidates for a planned product-page test
Time-bound: Complete the first review within 7 days
Build Better Prompts and Revision Habits
Give Each Part of the Prompt a Job
Four useful ingredients:
- Action: Identify what to replace, add or adjust
- Context: Describe the setting and light
- Preservation: Name the features that must remain recognizable
- Finish: Explain the visual style and intended use
A three-pass approach:
- Direction: Establish the main scene or transformation
- Correction: Address the most noticeable mismatch
- Review: Check details before preparing the final asset
Keep References and Revisions Organized
Working with several references:
- Use only the images needed to explain the idea, within the upload limit
- Assign a role to each source instead of leaving the combination ambiguous
- Check that the resulting light and perspective work together
Developing an image in stages:
- Settle the main composition before small details
- Keep the best result as the basis for further work
- Make the next instruction specific enough to verify
Manage the Budget and Review the Output
Watch the Cost of Repeated Attempts
Checking your credits:
- Review the task status if a failed request appears to remain charged
- Check your balance before starting another attempt
- Read the applicable plan terms before changing a subscription
Keeping spending deliberate:
- Use eligible starter credits if your account has them
- Estimate project cost from a small, representative test
- Set your own spending limit before producing a larger set
Review Before You Publish
A final check:
- Remember that an AI-content marker does not validate the image’s claims
- Confirm that you have permission to use the references and final material
- Keep a copy of the approved version and its source context
Troubleshoot the Next Attempt
Input Problems
- File size: Follow the uploader’s current size limit
- Clarity: Choose a source where the important subject is easy to inspect
- Format: Use a format explicitly accepted by the interface
Prompt Problems
- Too vague: Identify the subject, area and desired change
- Too much at once: Separate the main transformation from finishing touches
- Conflicting requests: Decide which requirement takes priority
Output Problems
- Identity drift: Add a clearer reference and specify distinguishing details
- Unwanted edits: Name the parts that should stay unchanged
- Wrong visual style: Describe the intended treatment more concretely
Make the Workflow Useful for Your Work
Try Nano Banana for Tasks Such As:
- Character studies: Exploring related images around a reference
- Campaign drafts: Comparing a few directions before production
- Written editing briefs: Turning a specific instruction into a visual result
- Concept development: Preparing images for review and further finishing
Bring the Results into Your Existing Process
For design teams:
- Use early images to clarify a direction
- Present alternatives with the brief that produced them
- Keep selected concepts together as a visual reference
For marketing teams:
- Develop a coordinated set of content ideas
- Prepare variations for a defined comparison or test
- Check each asset against the campaign’s visual guidelines
For e-commerce teams:
- Explore lifestyle settings around a product reference
- Plan seasonal scenes without changing essential product details
- Review every promotional image before placing it in a listing
A useful first project does not need to be ambitious. Choose one image, one meaningful change and a clear way to judge the result. That gives you a better foundation than a long prompt with no defined finish line.
As you become familiar with the workflow, keep notes on the references and instructions that work for your subjects. Include revision time and credits in those notes so the next project is easier to plan.
Whether you work alone or with a team, the same habits help: describe the intent, compare the result and refine deliberately. Nano Banana becomes more useful when each generation answers a concrete creative question.
Author

Categories
More Posts

Inside Google’s nano-banana Image Model: A Creator’s Guide to Better Edits
Explore Google’s nano-banana image model through reference-led editing, character continuity and practical ways to review and refine a result.

Nano Banana vs Seedream 4.0: Find the Right Fit for Your Creative Work
Compare Nano Banana and Seedream 4.0 for portraits, product scenes and visual concepts, with practical checks for image quality, revisions and cost.